Monday, 15 October 2012
Monday, 24 September 2012
Making fairy furniture - from mistakes to improved!
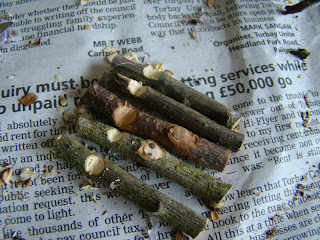
I went walking one day and picked up some twigs, they sat waiting for a while for me to do something with them for a while. So one evening recently while baby was asleep and the other half was out, I started trying to glue some of the twigs together. It wasn't very light and I got very glue happy and ended up with some furniture but didn't realise until the next day that it was awful! TUrns out you can;t just throw glue at it to stick it together. So I looked on the internet for tips on how to glue twig furniture together better but couldn't really find anything in detail, I came up with the ideas below and it works well so thought I'd put some of the things I discovered for others who may also be looking.
Here is the bad glueing! underside of a bench. (still to be redone!)
A badly glued chair.
So here is how I improved it, I broke the twigs apart again. Chose 5 twigs that were similar widths, and using a craft knife I dug out a groove that another twig could sit in. (shown below)
A rusty craft knife is fine!
I sanded down the twig to get as much of a clean surface. Using a minimal/yet enough amount of glue from the hot glue gun and get that twig in there quick before it sets.
I did the same on the other side and the seat for the chair is done
Turned over, you can see the 'seat' .The extra bits sticking out top and bottom are handy for slotting in the uprights/legs.
Here is upright twig in relation to the seat, it slotted in that top left corner of the seat square, I will try to show this better when I next make something. I used glue again.
To make the two back uprights/back legs I chose two thicker pieces of twig. I dug out two grooves that matched up with where it would meet the seat. this was a bit fiddly, I kept trying/ marrying it up to the seat and digging out more, until it fitted well. Below picture is the two knotches cut out with craft knife, one slightly above the other.
Here is the chair when finished, (note all the chipped bits lying around.) This one is wonky as the uprights were curved outwards but I like it's quirkiness.
I added a bar across the back of the chair, I cut little half moons out of the main uprights and rounded off the ends of the piece I chose to go across. It fitted in quite snugly, but again keep checking back to make sure you don't sand too much off.
The front legs were done in the same way as the back uprights
To make it stand up, you have to do a bit of sanding, trimming the feet to get it even.
The waterfall / hobbit hill!
We marked out a kidney shape with pebbles.
Chris cut around the edge
Then he carefully cut out the turf as we want to reuse it.
We started to fill up wheelbarrows full of earth (which was previously dug out from the decking area and piled up behind the music room) this is the only bit I was able to help with really, he was too good at the rest) that and stamping in the earth to make it solid
Lots of wheel barrows later
The mound was still suprisingly small!
Next stage, bit of turf
Trial waterfall with bin liner and pilfered from a beach stones!
Fairy Garden starts
Before Gwen was even an idea, I wanted to have a fairy Garden. Good job I had a girl I guess. They appear to be very popular in america and not so much over here, perhaps I can start more of a UK interest. So in an attempt to persuade more of you to get fairy gardening I will keep all garden things in a separate blog to my Gwen one!
To start off with it took quite a long time to choose an area of garden. A lot of people do fairy gardens in a big planter, or a half barrel thing. I wanted to have it just as a corner of the garden, a place where Gwen can go and sit and talk to the fairies (If she talks too much - which is a distinct possibility with her genes), she can leave them messages and see what she gets back the next day. She can leave her baby teeth there when they fall out for the fairies to take away, and generally play there, (much better to be outdoors) hopefully it will encourage her to be interested in gardening too.
So this is the area we chose - kinda boring at the mo huh.
Subscribe to:
Posts (Atom)


